The previous post was about building the hardware for a remote release timer, programming it and capturing a (large) number of JPEG files. This post is about going from there to creating a video.
Making a video
So here comes the part that was most difficult for me and where I had to learn a couple of new things. I have hardly worked at all with video before and turned to Google to figure out how I could accomplish some results without buying expensive commercial software. After all, this is just a minor hobby project.
After some iterations, these are the steps I went through to produce a video:
- Crop the images to 16:9 format (and also scale them down to 1920×1080).
- Assemble and code the images into an MPEG 4/H.264 file at 30 fps.
- Find some suitable free music to use as soundtrack.
- (Edit the music to fit the length of the video.)
- Add some title text before the main video and some more text after it.
- Publish it all on Youtube.
Here is how I did it on a computer running Windows 7:
Cropping and rescaling
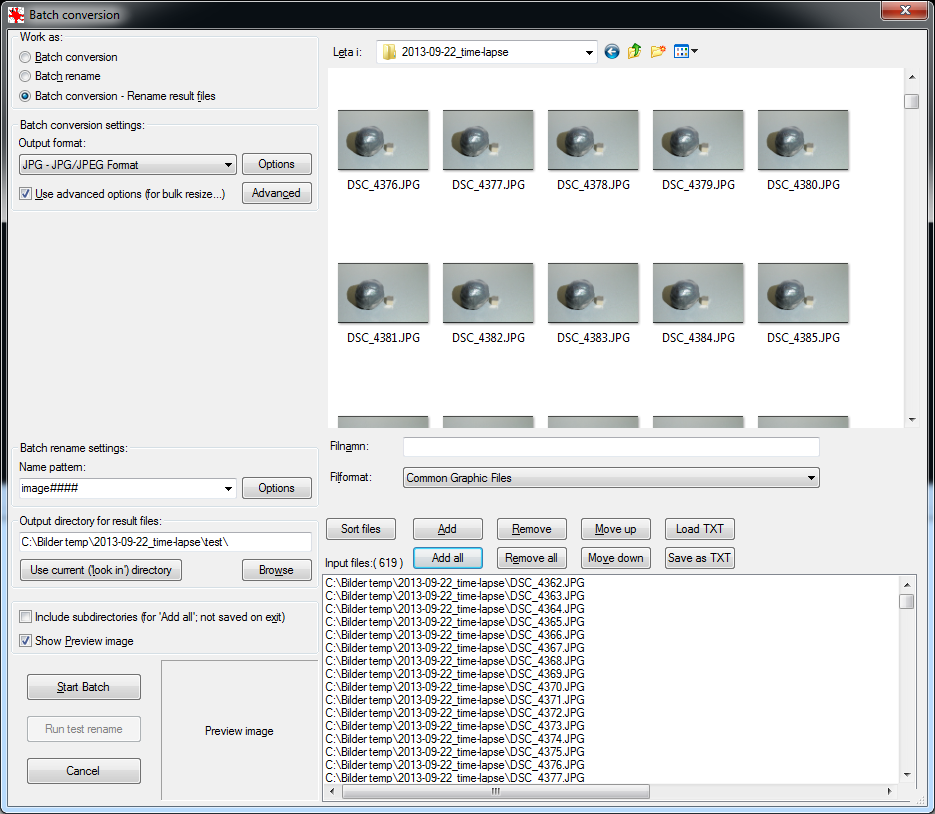
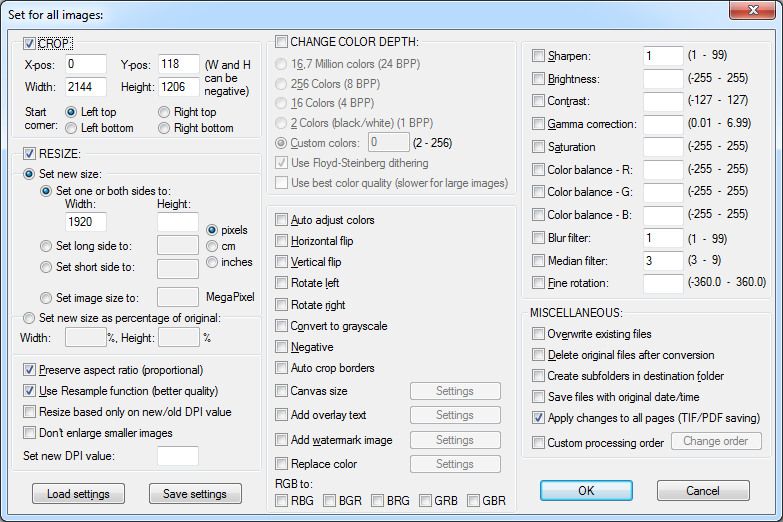
I had the excellent free (image) viewer Irfanview already installed and it turns out that it is the perfect tool for batch cropping and rescaling of photos. I found this tutorial that explains how to do it, but basically you just select File -> Batch Conversion/Rename, add the files you want to crop, click “Advanced batch conversion settings” and set up all the relevant parameters there. See screenshots below.
I had to crop from 2144×1424 to 2144×1206 (to get the 16:9 aspect ratio) and then I also let Irfanview rescale to 1920×1080 and place the resulting files in a subdirectory.


Images to video
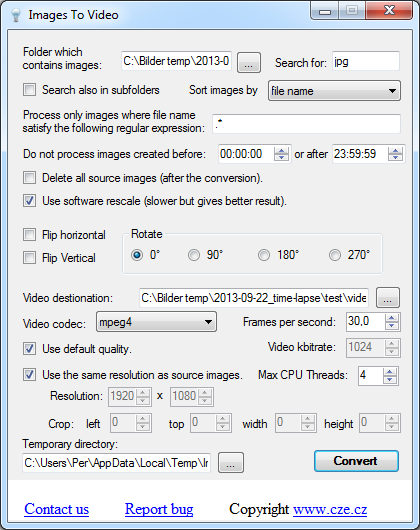
I found a wonderfully unbloated and straightforward – yet functional – tool to do the conversion from JPEGs to an mp4 video, namely “Images to video“. The program needs no installation and has a single window (it can also be used from the command line). Below is a screenshot of it.

After setting up this dialog, you just press Convert and after a (relatively short) while, a video file pops out. Since the cropping and scaling was done using Irfanview we do not have to worry about it here, which is good since I could not figure out how the cropping features here worked. As soon as I set any of the crop values to higher than 0, the resulting video file came out empty.
Soundtrack
A video is more interesting to view if it has some sound. It turns out that there exists quite a bit of music released under a Creative Commons license. This page has a list of links to various sites with royalty free music. I found what I was looking for at incompetech.com, where Kevin MacLeod has published a large number of tunes. You just need to credit him appropriately if you use the music.
Edit the music
You may or may not need to edit the music. If you want to e.g. cut out a part of a tune and have detailed control over fade it in and fade out, Audacity seems like a good choice. I used this at first, but the options in Windows Movie Maker (see next section) turned out to be enough for my humble needs at this point.
Bringing it all together
To compose a video with a title screen, some information after the actual video and a soundtrack, I used Microsoft’s Movie Maker that you can download for free. The program does not give you a lot of control, but it is straightforward to use and was good enough for this project.
Putting it on Youtube
This part is very easy. Just create a Youtube account unless you already have one and upload the video.
The results
So, what did become of all this? Below are some of the crude results of my efforts as a fledgling time-lapse video creator.
Magnetic putty devouring a magnet
Magnetic putty sneaking up on a magnet.
thx for te pointer to img2vid – works great!