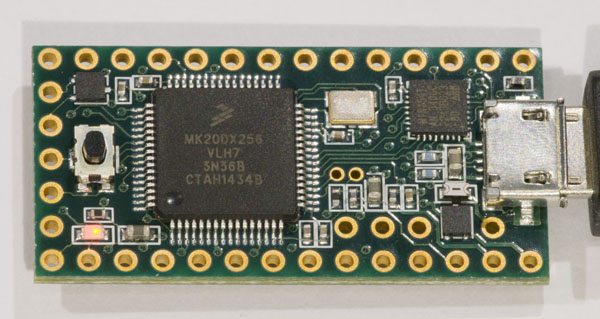
I just bought a couple of Teensy 3.1 boards to play with. The Teensy is a pretty small processor board that looks to be quite capable. It is smaller than the Arduino Nano boards I have been using for various other projects and still it has more I/Os, is cheaper and has a much more powerful processor, an MK20DX256, which is a 32-bit ARM Cortex-M4 from Freescale running at 72 MHz with 256 kB flash and 64 kB RAM.
The downside is perhaps that it is a proprietary design and while the schematics is available, the bootloader running on it is not, so unlike with the Arduino Nano, it is not possible to start out with a Teensy for prototypes and then move to a custom layout while still being able to use the same bootloader.
It is possible to develop programs for the Teensy using both an adapted version of the Arduino environment as well as using Eclipse. There are quite a few libraries available, including NeoPixel, OneWire, Xbee, capacitive sensing, IR remote controls, LCD displays, PS2 keyboard input, CAN, stepper motor control etc.
First you need to install the normal Arduino environment, and then the above mentioned adaptations. When you subsequently run the Arduino environment, a number of Teensy board versions are now available as target boards. Also several example programs are available in the menu File -> Examples -> Teensy.
To get started I took the very simple LED-blinking program Blinky and added some parameters to modify the blinking to make it easy to see if I was successful in uploading the new program. Here is the code I came up with:
/* LED Blink, Teensy Tutorial #1
   http://www.pjrc.com/teensy/tutorial.html

   This example code is in the public domain.
   Modified by Per Magnusson
*/

// Teensy 3.1 has the LED on pin 13
const int ledPin = 13;
const int ontime = 50;     // LED on time in ms
const int offtime = 50;    // LED off time in ms
const int pausetime = 1000; // Pause time between bursts
const int blinks = 10;       // Number of blinks per burst

// the setup() function runs once, when the sketch starts

void setup() {
  // initialize the digital pin as an output.
  pinMode(ledPin, OUTPUT);
}

// the loop() function runs over and over again,
// as long as the board has power

void loop() {
  for(int i=1; i<=blinks; i++)
  {
    digitalWrite(ledPin, HIGH);     // turn the LED on
    delay(ontime);                  // wait
    digitalWrite(ledPin, LOW);      // turn the LED off
    delay(offtime);                 // wait
  }
  delay(pausetime-offtime);         // wait for the next burst of blinks
}
Uploading of the sketch to the device turned out to be a bit messy. It seems to be necessary to press the button on the Teensy prior to uploading. Pressing the Auto button in a small window that appears on the screen might also help. Just uploading without doing anything special results in a timeout and the previous sketch being stopped.
Anyway, so far so good. Getting to the equivalent of Hello World turned out to be almost as easy as with an Arduino.
Seems a tad pricy that board. I’m looking at STM32F103 for my own hobby stuff. Can be found on eBay for something like $2 (just the chip of course). Cortex-M3 72MHz 128Kb flash 20Kb ram. So not as much memory but very capable and includes USB hw.
Yeah, the STM32F10x family also looks interesting. I have designed a couple of boards using STM32F107 (with Ethernet) at work, but I have not done any programming on them myself.
There are so many capable yet cheap processors out there nowadays so it is hard to decide which one to use for any given project. One of the harder things to figure out when selecting a processor for a hobby project is which ones have good free development environments and good open source libraries. The Arduino environment is nice for its low bar of entry, but quickly becomes frustrating for bigger projects.
I tend to do my own simple OSs and write drivers for peripherals as I need them. I’m a control freak when it comes to embedded software and I much prefer to write everything myself. Of course that may not be so efficient in terms of development time but it’s fun to understand every piece of an MCU.
I guess you still need a compiler and a programmer and maybe a debugger . I have not yet started to set up a real environment to develop for ARM-based processors (Eclipse + gcc maybe), but I expect there to be some hoops to jump through to get to Hello World for a new processor.