Ikväll stod jag och SP Devices som värd för en träff i mötesserien “Elektronikforum” som dragits igång av Joacim Frisk på Prevas. Elektronikforum riktar sig till elektronikkonstruktörer i Linköping. “En plats att träffas, ta en fika, diskutera elektronik och lyssna på intressanta föredrag.”
Föredraget jag höll var i stort sett en repris på ett föredrag jag höll för knappt tre år sedan och hade titeln “Filtrering av matningsspänningar för känsliga analoga tillämpningar”. Bilderna från presentationen finns här:
Drygt 20 personer hade mött upp och både före och efter själva föredraget diskuterades det elektronik (och kanske en del annat) i mindre grupper. Det verkar som om deltagarna uppskattade tillställningen.
Jag hann inte gå runt och delta i alla diskussionerna, men här följer några länkar till sådant som nämndes i samband med föredraget eller i de samtal jag var med i:
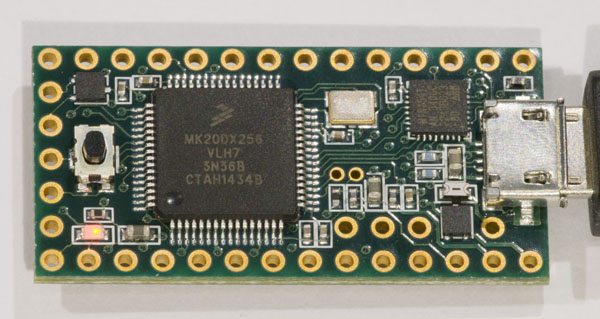
I just bought a couple of Teensy 3.1 boards to play with. The Teensy is a pretty small processor board that looks to be quite capable. It is smaller than the Arduino Nano boards I have been using for various other projects and still it has more I/Os, is cheaper and has a much more powerful processor, an MK20DX256, which is a 32-bit ARM Cortex-M4 from Freescale running at 72 MHz with 256 kB flash and 64 kB RAM.
Teensy 3.1
The downside is perhaps that it is a proprietary design and while the schematics is available, the bootloader running on it is not, so unlike with the Arduino Nano, it is not possible to start out with a Teensy for prototypes and then move to a custom layout while still being able to use the same bootloader.
It is possible to develop programs for the Teensy using both an adapted version of the Arduino environment as well as using Eclipse. There are quite a few libraries available, including NeoPixel, OneWire, Xbee, capacitive sensing, IR remote controls, LCD displays, PS2 keyboard input, CAN, stepper motor control etc.
First you need to install the normal Arduino environment, and then the above mentioned adaptations. When you subsequently run the Arduino environment, a number of Teensy board versions are now available as target boards. Also several example programs are available in the menu File -> Examples -> Teensy.
To get started I took the very simple LED-blinking program Blinky and added some parameters to modify the blinking to make it easy to see if I was successful in uploading the new program. Here is the code I came up with:
/* LED Blink, Teensy Tutorial #1
   http://www.pjrc.com/teensy/tutorial.html

   This example code is in the public domain.
   Modified by Per Magnusson
*/

// Teensy 3.1 has the LED on pin 13
const int ledPin = 13;
const int ontime = 50;     // LED on time in ms
const int offtime = 50;    // LED off time in ms
const int pausetime = 1000; // Pause time between bursts
const int blinks = 10;       // Number of blinks per burst

// the setup() function runs once, when the sketch starts

void setup() {
  // initialize the digital pin as an output.
  pinMode(ledPin, OUTPUT);
}

// the loop() function runs over and over again,
// as long as the board has power

void loop() {
  for(int i=1; i<=blinks; i++)
  {
    digitalWrite(ledPin, HIGH);     // turn the LED on
    delay(ontime);                  // wait
    digitalWrite(ledPin, LOW);      // turn the LED off
    delay(offtime);                 // wait
  }
  delay(pausetime-offtime);         // wait for the next burst of blinks
}
Uploading of the sketch to the device turned out to be a bit messy. It seems to be necessary to press the button on the Teensy prior to uploading. Pressing the Auto button in a small window that appears on the screen might also help. Just uploading without doing anything special results in a timeout and the previous sketch being stopped.
Anyway, so far so good. Getting to the equivalent of Hello World turned out to be almost as easy as with an Arduino.