I recently had a duh moment. I was trying to repair a broken fan motor and I had determined that the immediate problem was that a thermal fuse used to protect the stator windings from overheating was broken. I ordered a few new thermal fuses, soldered one in and carefully insulated it electrically using heat shrink tubing.
When I tried to power up the fan, I was surprised to find that it was as dead as before. Some quick troubleshooting revealed that the new fuse was broken. Since the motor had not even made the tiniest jerk when I plugged it in, I assumed the fuse must strangely enough have been dead on arrival and I removed it from the motor.
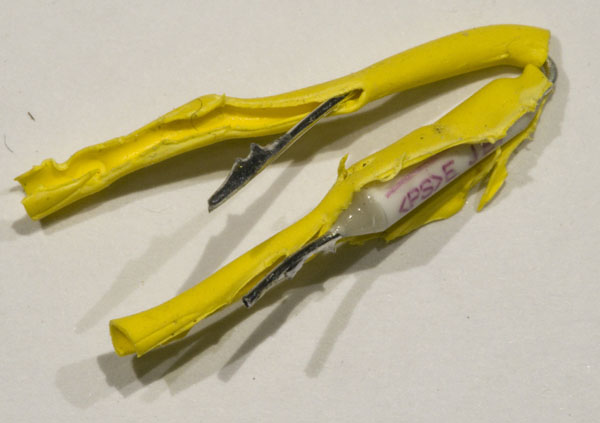
This is what the fuse looked like when I had removed it:
Fortunately, I had more fuses, so I proceeded to solder another one into the circuit. Wise from my previous experience, I verified that it was working before the operation and I also measured it after I had soldered and heat shrunk it into the motor circuit. To my surprise it was suddenly broken! And I had not even powered the motor up!
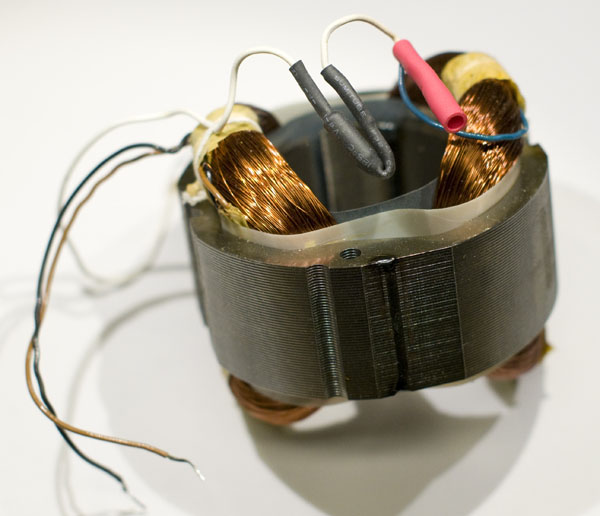
This is when the duh moment occurred.
Thermal fuses blow in an unresettable fashion when they reach a certain temperature, in my case around 120 °C. This is the whole point of the component. And I had failed to consider this when I happily soldered the thing in, just as if it were a resistor or some other normal component. There is obviously a big risk – not to say certainty – that both during soldering and while shrinking the tubes, the fuse gets heated to higher temperatures than it can stand.
So how do we get around this problem? I did not have any thermal fuses with long leads that would insulate them during soldering, but with some care it is in fact possible to solder a thermal fuse. Here are the tricks I used in my third attempt:
- Do not shorten the leads of the fuse. Leave them as long as they are.
- Put several alligator clips on the lead between the body of the fuse and the tip where you apply solder. This is to lead away heat so that it does not reach the body (see picture below).
- Solder for as short a duration of time as possible. Preferably less than a second at a time to prevent heating of larger parts of the lead. But be careful to not get a cold solder joint despite this. It’s a delicate balance.
- Do not shrink the tubes. Let them just sit there loosely.
Below are some pictures from the process.
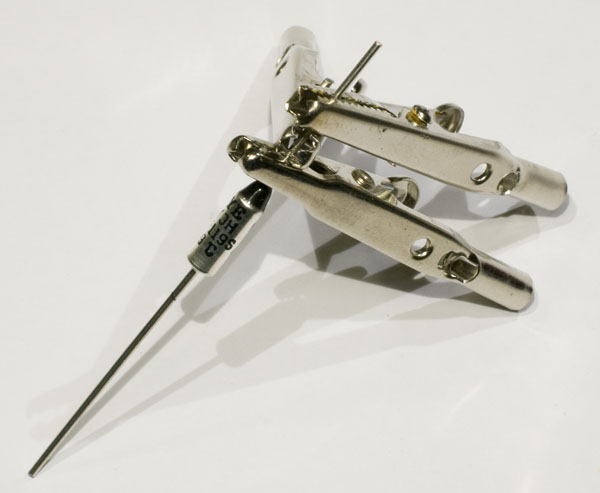
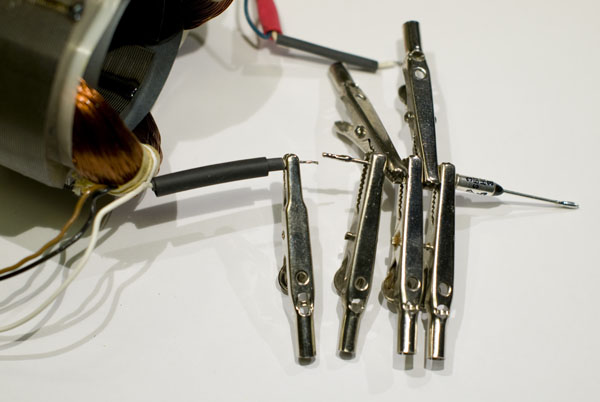
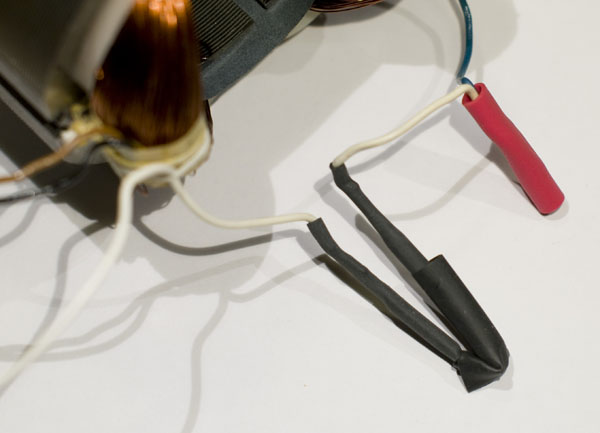
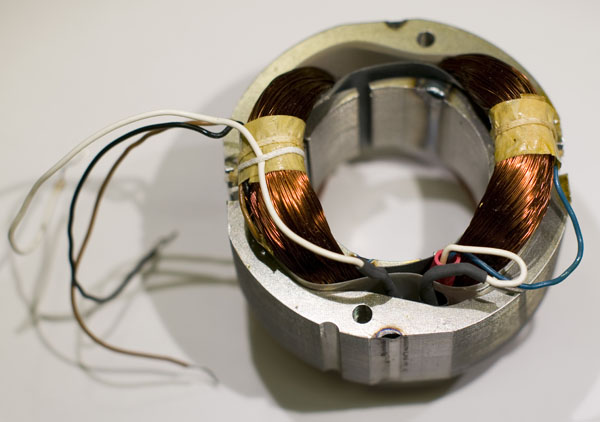
Using these tricks, my third attempt was successful and the fan is now back in working condition.
It cost me two thermal fuses, but I think I have got the lesson about what not to do to this (for me at least) somewhat unusual component.
How are thermal fuses handled in production assembly?
Good question. I think they are most commonly crimped. Spot welding might also be an alternative since it goes quickly and without much spreading of the heat. The fuse I replaced had long and thin wires built in, so soldering those would not have been a problem. In some cases it might be feasible to attach a thermal fuse to screw terminals, but I think that is rare due to mechanical constraints.
does butt connectors work for thermal fuse on bath exhaust fan motor?
(X22 UMI 3A 115C 250V)?
They probably do. Unless there is not enough space for them.
One important tip is to not bend the leads nearest to the fuse as it can crack the epoxy end and affect the structural integrity of the fuse causing it to fail to work when the temp goes critical.
Notice you had very sharp bends in your pics.
Hi Jan,
You might be right. A good habit when bending component leads is to hold the component with a pair of pliers between the component body and the bend to avoid putting any stress on the component body.
Why bother soldering the fuse? Just use butt connectors with an added sleeve. Problem solved.
Thanks for the tip. Used needle-nose vice-grips, which was helpful in the tight corner. Wouldn’t have been enough room to crimp or use butt connectors. Bought a package of 5 but it worked with the first one.
PLACE THE FUSE IN AN ICE WATER BATH OR ON AN ICE CUBE.
ROD
What if we don’t have Alligator clips, as you have mentioned here its importance. Can we replace it with some other equipment?
cold pliers gripping the lead firmly between the solder and the Fuze!, The slightly grooved ones are even better than forming pliers.
Hi Betty,
You need something that conducts heat away efficiently. A suitable pair of pliers with a rubber band around the handles to keep it clamped onto the component leg should work.
Per
They make connectors that are not copper or aluminum & have no plastic cover for only crimping. Sometimes you have to place an extra short piece of hard wire to fill the gap in the connector. A piece of the long thermal fuse works great.
Does it matter what wire is wired to the pointed end of the thermal fuse
No. It does not matter.
What the reason of using a heat shrink tubing is? I suppose it works as heat isolation. According to the manufacturer when designing, make it sure to secure as much longer lead wires as possible, and put lead wires and body to the nearest place where heat generates in order to ensure the thermosensitive functions.
The outer shield of the Thermal Cutout is carrying line voltage. If you are not insulating this, you are going to have a ground when that thermal cutout casing or any part of either lead end comes in contact with a grounded part of the device or harness. You must insulate these when that is a possibility.
If you have alligator clips clip one lead of the fuse and place in a small bowl of water with one end sticking out enough to solder a wire onto it. Tin the lead from the fuse then the wire to the fuse. Submerse in the water. Dry the fuse. Reverse the clip and sink in the water then tin the other lead and solder wire on that end. Dry the whole thing off and install