![[SW flag]](pic/Sw_flag_40.png)

![[UK/US flag]](pic/UK-US_flag_40.png)

|
|

|
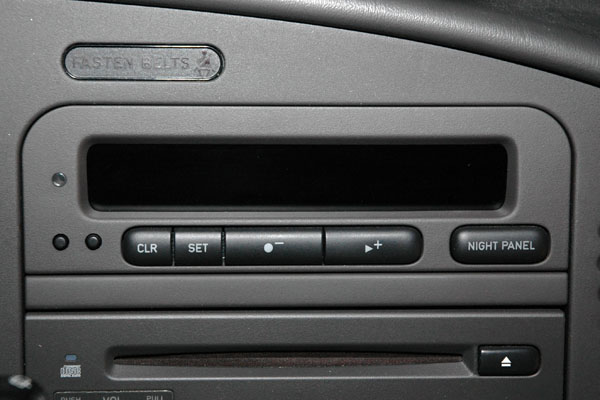
This article was first written in 2007. Additions were made in 2013. Saab SID Display Repair InstructionIt is a relatively well known fact that many Saab 9-3s and 9-5s (and late 900s) are plagued by dead, fading or intermittent pixels on the SID (Saab Information Display) LCD panel. This article describes how to fix the problem, as well as how to change the back-light bulbs in the unit. First a boring disclaimer though. Although I personally consider this repair quite easy to do, it is possible to damage the unit if you are not careful and skilled enough in performing this type of repair. All pictures here show the SID in my Saab 9-3 2002. There are many other variants of the SID, but the basic principles on how to disassemble and repair the units are to the best of my knowledge fairly similar. Let's get started. RemovalBefore you start to remove the SID, you should make sure you already have replacement bulbs if you intend to replace any of the back-lighting bulbs, since you should not drive the car to your Saab dealer (or anywhere else) while the SID is not in place. There are no screws or any other visible mechanism that holds the SID in place:
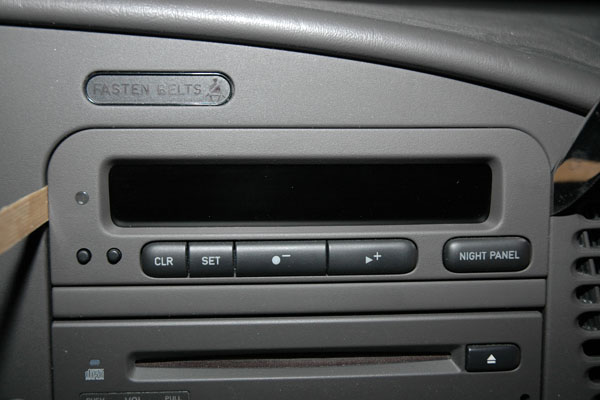
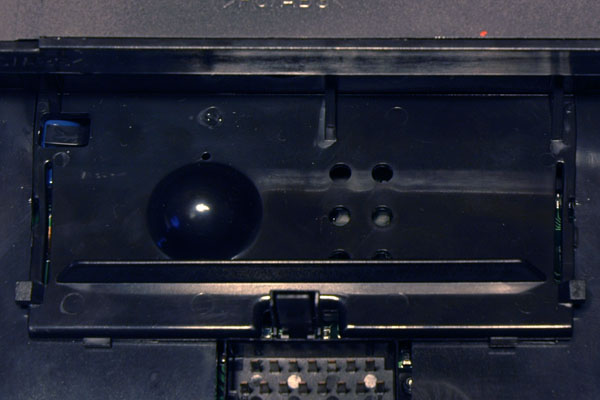
The display is snapped into its slot and can be removed by inserting and bending with suitable thin tools at the left and right edges of the front panel, see below picture.
I have found that kitchen knifes work quite well as levers in this case. It is important that the tool is thin and does not have any sharp edges or corners that can leave marks. A thin wooden stick might also work. Screwdrivers are however quite unsuitable. It is not necessary to insert the lever very far (about a cm or even less is enough) before one starts to bend gently to pull the unit out:
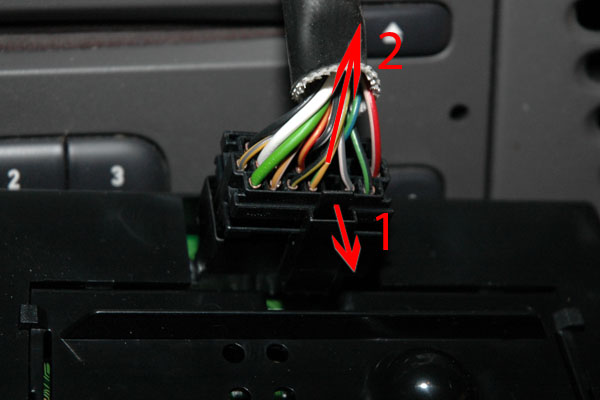
DisconnectionThe SID is connected to the rest of the electronics in the car with a cable ending in a connector with a snap lock. To remove the connector, the lever at the connector has to be bent away a little bit from the connector (1) before the connector is pulled out of its socket (2), see below picture:
Do not drive the car as long as the SID is removed since some important safety systems (like the horn) do not work without it. DisassemblyNow that the SID is loose, it should be brought to a suitable workbench. Suitable means that it should be clean and reasonably safe from electrostatic charge since the unit contains sensitive electronics that can be damaged by electrostatic discharges that are tiny enough to be unnoticeable to a human. Ideally an ESD (ElectroStatic Discharge) safe work area should be used, but if you do not have access to that, you can improve things by a few simple means:
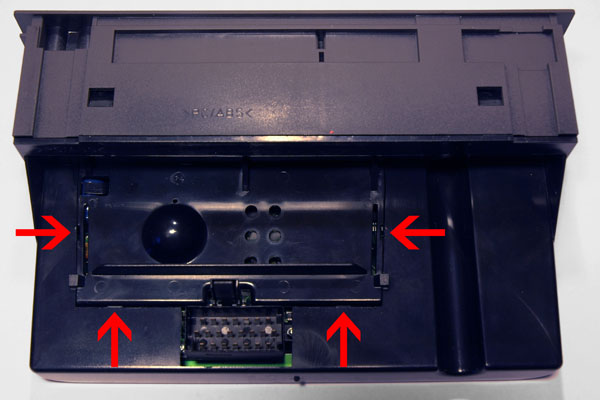
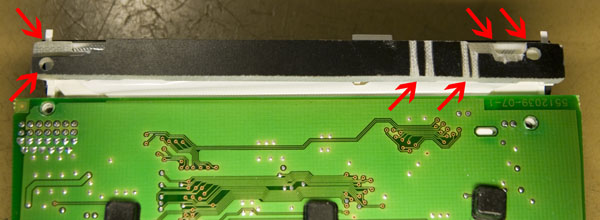
First you need to remove a plastic cover that is snapped into the rest of the assembly. The cover on my version of the SID was attached by four snap locks (see the arrows in the below picture). Undo the snaps by inserting a small flat screwdriver and bend gently.
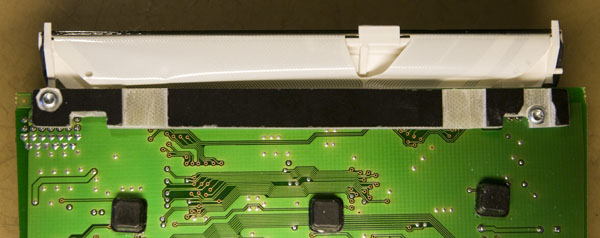
Below is a picture where the snap locks have been disengaged and the plastic cover is free to be removed.
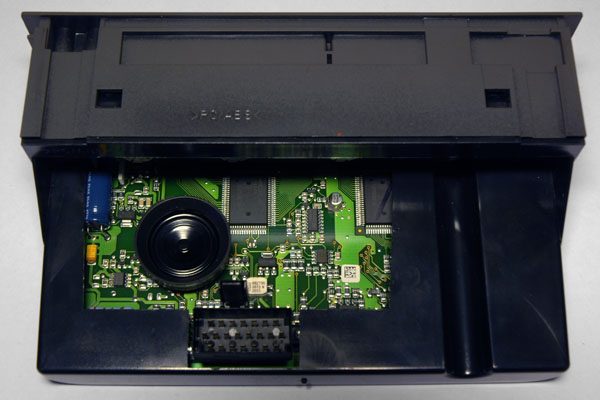
When the cover has been removed the circuit board is visible:
Turning the unit over on the front reveals the white plastic back sides of the six back-lighting bulbs. If you intend to replace a bulb you just have to insert a flat screwdriver in the slot at the back of the bulb and twist a few degrees to release it. If one bulb has gone, it might be a good idea to anyway replace all of them now that you have the chance.
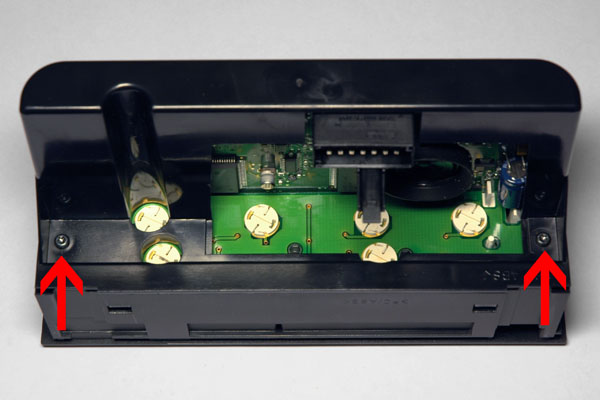
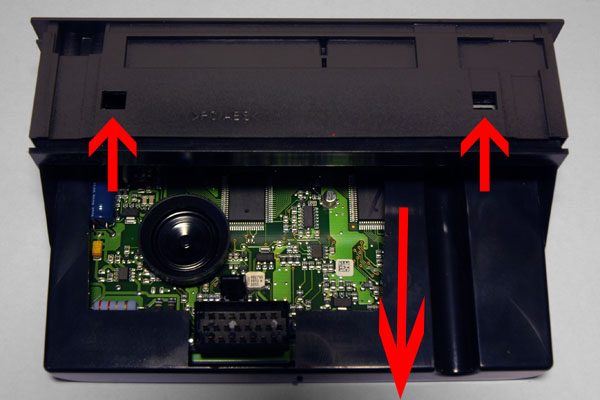
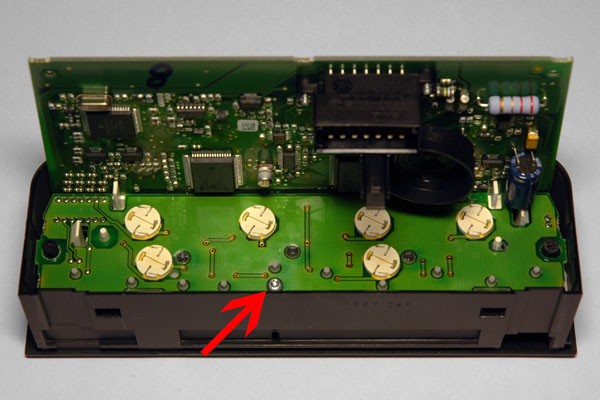
If you need to fix dead LCD segments, you have to continue with the disassembly by removing the two screws pointed at in the above picture. For this you need a T10 torx screwdriver. After the screws are gone, you need to push down on the two snap locks on the top and two identical ones on the opposite side while you pull on the plastic cover like shown in the picture below. This can be a little tricky, especially since the circuit board might have a few rubber feet that tend to cling to the plastic and prevent it from sliding off easily.
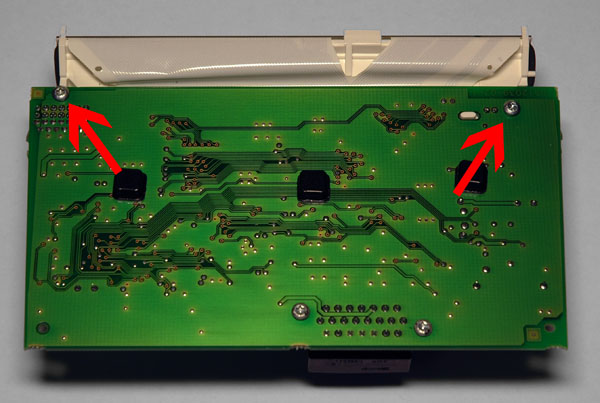
With the cover gone, a new screw is revealed. Unscrew this and gently pull out the circuit board assembly from the front plastic cover.
Now we are down to the bare circuit boards of the SID, but two more screws await before the display assembly can be detached from the main board. There is also a pin header connecting the two parts, but this slides apart quite easily.
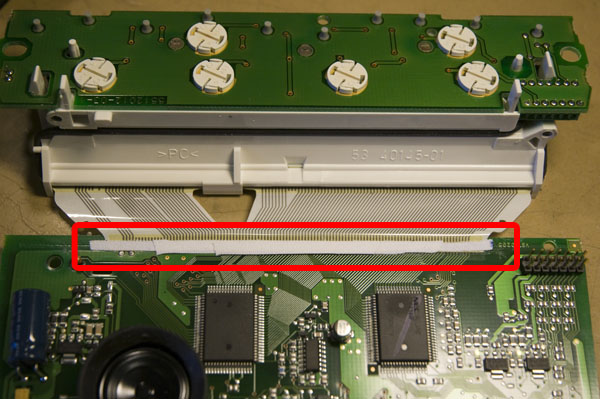
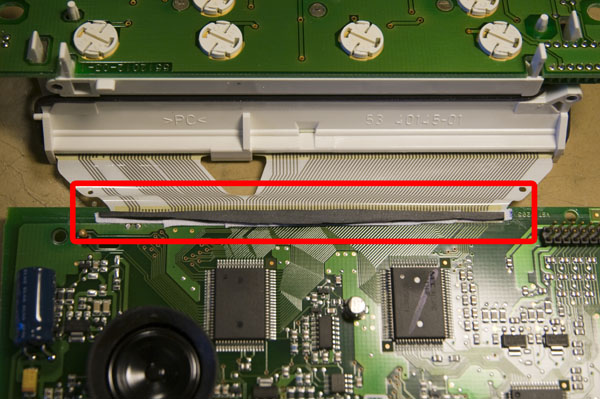
RepairThere is a flat flexible cable connecting the main board with the display. This cable is mysteriously attached to the main board without any connector and it is this unreliable connection that invariably is the cause of the dead pixels. A rubber band around the plastics at the display is intended to press on the connection between the wide flex cable and the main circuit board, but this is apparently not enough to give a long term reliable connection. To fix the dead pixel problem do the following:
LinksI am not the only one to experience this problem and Google gives thousands of hits on the subject. Most of them do however seem to be to sites selling new or refurbished SID units, but I also found the below site that tells you how to repair it yourself: |

| Updated: 2016-12-11, 14:28:27 |
|